
The f-Stops Here
A series of columns on outdoor photography
Snowshooting
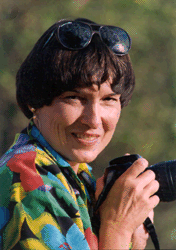
by Sharon Watson
Several winters ago, I watched two horses frolicking in swirling snow on a southern Idaho ranch. I hoped I could capture the scene on film without getting my camera wet!
Wrapping a gallon-sized plastic bag around my Pentax, I bit a hole in it for the lens and used a rubber band to secure it there. I carry odds and ends like rubber bands, twist ties, baggies, masking tape, etc. because I've often found them useful while out taking photos in the outdoors.
Even with the plastic bag, wind still blew snow onto the lens, so I added a rubber lens hood to help deflect some of it.
I learned a few things about shooting in snow conditions that day, and on many of Idaho's sparkling wintry days since. In crisp cold, snow will usually fall off the camera. A camera being kept warm and dry under wraps until use, however, will melt flakes on contact. This amounts to falling rain, and equipment must be protected.
Snow directly on the lens will cause blurred photos, so use a lens hood. Constantly rubbing snow off a lens will eventually remove the multi-coatings put there to improve picture quality. Since a lens is threatened in many other ways as well, it's necessary to use a skylight or UV (ultraviolet) filter to protect that costly glass.
A skylight filter also helps correct snow's tendency to turn blue as it reflects a clear blue sky. Our eyes don't notice the blue, but the photos will show it (especially slides). Southern Idaho in particular boasts many of these blue-sky winter days!
Snow is so bright, the camera's metering system assumes it's the main subject and shuts down the lens opening (f-stop), or speeds up the shutter. Any person, animal or object in the snow may therefore turn out totally black in the photo. In addition, the "properly exposed" snow itself usually turns out gray instead of white because internal exposure meters are set for an 18% neutral tone.
To get super-white snow in your photos and prevent subject black-outs, open your aperture by 1 to 2 stops (for overexposure). Most cameras have a manual mode or a compensation dial for making these adjustments. Multiple shots of the same scene can get expensive as you try it at different exposures. With practice, though, you're guesses become more accurate. I automatically overexpose (go against the camera's settings) photos with snow or other bright backgrounds.
Blinding conditions on clear days might mean the biggest problem is whether you can take the picture at all! High speed film (200 ISO and up) usually sets off flashing lights that say, "no way!" Use a "slow" film of 100 ISO or less. In a pinch, add a polarizing filter to reduce the light by a stop or two. This filter will also brighten up some colors, if not overused.
Snow photography is also tricky on overcast days. In the flat, even light, there are no shadows to give depth and definition to distant mountains and trees, or much of anything. Sometimes closeups are excellent in flat light, but often they too need shadows for a sense of sharpness and depth.
The deeper the overcast, the greater the problem. It affects black and white photos more, since color itself gives definition to color shots. Fill-in flash will help put some snap back into dull-day pictures.
If a camera is dropped in the snow, quickly wipe off any visible moisture. Then set the camera in the sun to dry. Chances are no harm has been done. It might be more serious if moisture gets inside the camera. A blow dryer may help, if you can get to one soon.
ANNOUNCEMENT:
The North American Nature Photography Association (NANPA) is holding its third annual meeting in Corpus Christi, Texas on January 16-19, 1997. This meeting's theme is "Partnerships." Contact NANPA for more information: (303)422-8527.